
Monday, May 7, 2012
Kid's Scrapbooks
I am currently 4 years and 3 months behind in my scrapbooks for the kids. Giving that my daughter has just turned 5 this means that I am yet to finish one book for her..Yikes! However, last night I dusted off the scrapbook stuff and finished a page! :) Sometimes it just takes the action of getting the photos on the page that gets me started again. :)
Sunday, April 29, 2012
Weekend prototype Part 2
I know it's been a long delay on finishing the weekend fun project but this weekend I have almost finished!!!
This weekend I ventured to one of the hardware stores and purchased a 1x6x10 cedar wood planks. (this week I learned that a 1x6x10 is not actually 6 but about 5 1/2inches.) I had them cut the boards into 6" cuts. So, the tiles are 6x51/2.
Next, I sanded the edges down so they are more rounded and smooth. When I was finished sanding I laid out the letters and realized they are too big. So, I re-cut the letters 4.25"and the little letters/numbers are still 1" (actual size) using the Sans Serif cartridge on the Cricut.
After re-cutting the letters I simply spread Mod Podge on the wood and placed the letter in the glue. I let the Mod Podge dry and brushed another layer of Mod Podge over the letter after the first layer was dry.
Here is a preview of the completed titles:
Wednesday, April 11, 2012
Princess Party
My daughter and her friend had a princess party at one of the jump places. She wanted a Cinderella Carriage. To make this cake I used the Wilton- Sport Ball Pan. I took creative liberty on this and made it pink.
Some issues I had with this one... I tried to make the wheels and driver seats out of royal icing and they broke. I will need to explore using Royal icing more. :) Then I tried to make it out of white chocolate and that broke. last minute I went with the pip cleaners!
I added the girls initials on the door for some a little fun touches. :)

The second cake my daughter didn't care what it was as long at it stayed in the princess theme! I love the idea of getting to do whatever I want...I just wish I had more time to plan for it. Instead I put icing to cake and came up with this:
Three layers: Two 10 inch and one 6 inch. Then I got a plastic crown to put on the top....

The girls loved the cakes and that is all that matters! :)
Saturday, March 31, 2012
Zumba.... Yeah I loved it :)
Today took a Zumba class!!! I got confused, I was exhausted and breathing hard. However, it was sooooo much fun!
I got this picture off Pinterest: (makes me LOL)

I didn't care how I looked I just lived in the moment and didn't care about the others and had fun!!!
I got this picture off Pinterest: (makes me LOL)

I didn't care how I looked I just lived in the moment and didn't care about the others and had fun!!!
Monday, March 26, 2012
Blue Orchid... Thanks Hubby :)
Today my wonderful hubby had a beautiful blue orchid waiting for me me when I came home. I have had my eye on one of these forever and today he thought of me and got one for me. I LOVE, LOVE, LOVE it!


I think that Orchids are now one of my favorite flowers.:)


Sunday, March 18, 2012
NinjaGo Sleepover
with only 30 hours to plan and execute...Saturday we had our son's 8th birthday party. He wanted a NinjaGo sleepover. So, around 5pm, on Saturday, 8 boys arrived for a Ninja adventure!
I had planned games but was surprised how they entertained themselves most of the night.
The cake: Two Lego heads... One with the Ninja head gear and one yellow head. We made these with the Stand -up Jack-o-lantern Pan from Wilton. The yellow head we added a lg marshmallow cut in half.


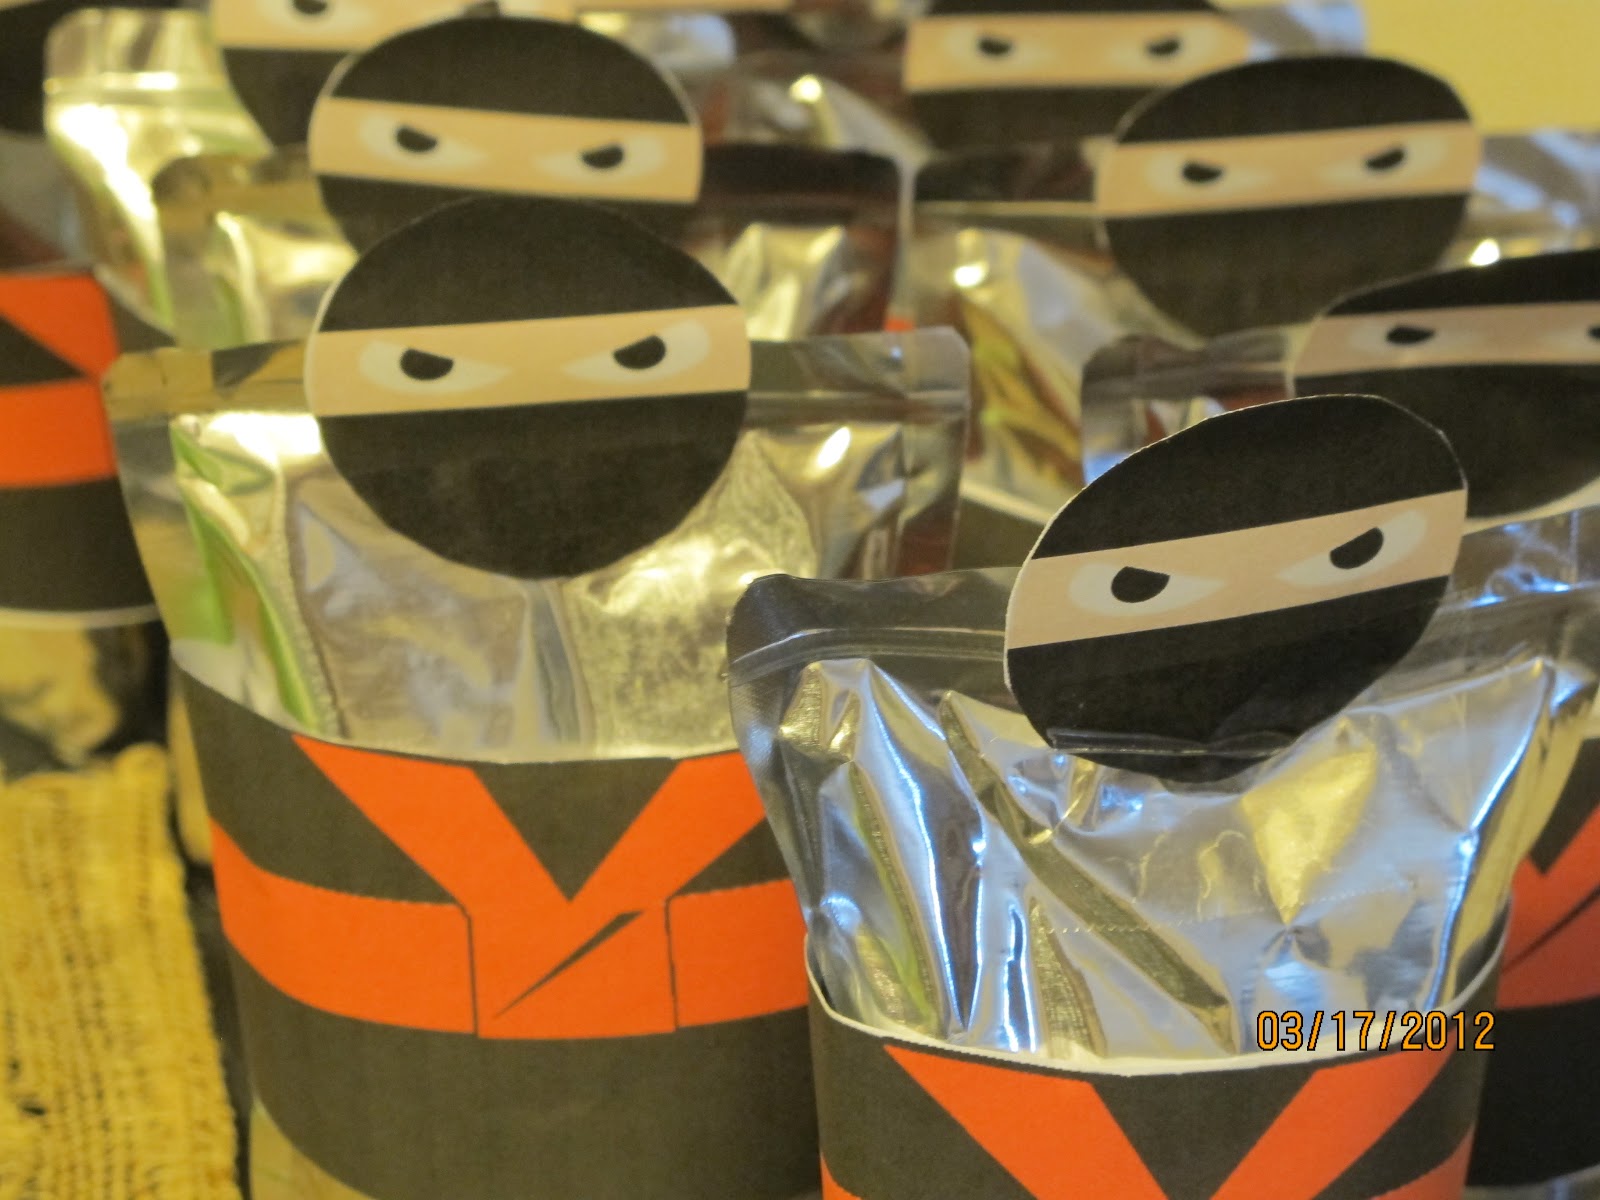
The Juice packets- Found this supper cool cupcake image that I taped to the juice packet.: http://foodartparty.blogspot.com/2010/08/ninja-cupcake-wrappers.html


Treats table:


We had clues for them to find the headbands and the Ninjago booster packets for every boy. They had fun searching for them! We had other games but the boys mostly wanted to play with the Nerf guns, Beyblades and Wii so I just let them enjoy what they wanted to do.


It seemed that all the boys had fun! It was the first sleepover for all the boys to sleep over so we felt good about that :)
I had planned games but was surprised how they entertained themselves most of the night.
The cake: Two Lego heads... One with the Ninja head gear and one yellow head. We made these with the Stand -up Jack-o-lantern Pan from Wilton. The yellow head we added a lg marshmallow cut in half.


The Juice packets- Found this supper cool cupcake image that I taped to the juice packet.: http://foodartparty.blogspot.com/2010/08/ninja-cupcake-wrappers.html

Treats table:
- The rice crispy treats Sushi (found on many sites)- Fruit by the foot, Swedish fish and rice crispy treats
- Marshmallow White Ninjas (my hubby's idea)- yellow and dark chocolate icing (Kids LOVED and supper simple)
- Chocolate covered Fortune cookies: http://vixenmade.blogspot.com/2012/03/ninjago-party-feature.html My daughter (almost 5) did these in a few mins! They looked great on the table and were a lot of fun for the kids to eat and read their fortunes!
- The normal veggies, fruit and chips also offered and was proud to see the kids picking veggies over other treats! (one little tip- While we waited for friends to arrive and for things to start I allowed them to eat the Veggies and Fruit first :) )


We had clues for them to find the headbands and the Ninjago booster packets for every boy. They had fun searching for them! We had other games but the boys mostly wanted to play with the Nerf guns, Beyblades and Wii so I just let them enjoy what they wanted to do.


It seemed that all the boys had fun! It was the first sleepover for all the boys to sleep over so we felt good about that :)
Friday, March 16, 2012
Slow Cooker Chicken Tikka Masala
Trying something new… I have been working 60 to 70 hours a week for a few weeks so blogging has not been on my list of things that I have time to do L
Yesterday I tried another an recipe from: http://themealplanner.blogspot.com/2009/07/slow-cooker-chicken-tikka-masala.html
This site has so many good recipes! I will be trying more! I always wondered how to make the rice yellow and now Iknow! J The review from the family is that it was ok.. I love the idea of it being cooked in the slow cooker but it didn’t taste the same as the one that I cooked with Kiran. Maybe I will try her recipe in the slower cooker :)

Subscribe to:
Posts (Atom)